7 minutes
Jupyter Notebook on Compute Engine with HTTPS
Originally published on Medium, Feb 19, 2020
Jupyter Notebook on Compute Engine with HTTPS

I wanted to run/serve Jupyter Notebook from my remote GCE instance and access it through my laptop’s browser to test and visualize Python code snippets. I’ve done this before in a previous post I wrote a few years ago but a few things have changed in the setup. For this setup, I wanted to use https to access the notebook URL which required SSL certificate setup. As stated in the title, this post steps through how I setup Jupyter Notebook to run on my GCE using HTTPS.
1. SSL (Secure Sockets Layer)
SSL is a way to secure connections between your web browser and a website. This section reviews how to setup a self-signed SSL certificate that will enable using HTTPS.
Note, you don’t have to set this up to get for remote access to Jupyter Notebook. You can skip this step and setup to use straight HTTP for access. The approach in this section is a bit hacky because I self-sign the certificate and then force the browser to accept the certificate since it hasn’t been verified by a certificate authority. If you want to use https to secure access, a more solid approach is to get a fully compliant certificate that is registered with a certificate authority. Jupyter’s site has a couple great references on how to do that through Let’s Encryptand this tutorial. Still if you want to use https but don’t want to do the steps to register then here we go.
Self-signed Certificate Setup
I used openssl, a widely used crypto library that implements SSL, to create the certificate.
For the self-signed setup, create a folder to put the certificate related files.
mkdir ~/ssl_cert && cd ~/ssl_cert
Generate a new private key.
openssl genrsa -out example.key 2048
The 2048 bit encryption refers to the size of an SSL certificate which has 617 decimals. According to Wikipedia, “50 supercomputers that could check a billion billion (1018) AES keys per second (if such a device could ever be made) would*, in theory, require about 3×1051 years to exhaust”.* Basically, it applies strong encryption to the communications going on between your local browser and the remote VM.
Create a signed certificate.
openssl req -new -key example.key -out example.csr
This prompts you to fill out the certificate with the country, city, state, common name and other details. Some information is required with other pieces you can leave empty and just return. It’s helpful to put something into the certificate so you can self verify it later.
Create a self-signed certificate.
openssl x509 -req -days 365 -in example.csr -signkey example.key -out example.pem
To create the self-signed certificate, it took in the signed certificate and the private key. Note, the X.509 certificate contains information about the certificate holder, the signer, a unique serial number, expiration dates and some other fields. Days sets when the certificate will expire; thus, the one I created will expire in a year. For Jupyter Notebook, I needed the self-signed certificate file with the pem extension. You can also output to a crt file type.
The above command returns: Signature ok and shows the details of the cert with a NAME and CREATION_TIMESTAMP to verify it was created.
Complications | Browser Issues
As mentioned, your browser will not like this self-signed certificate. You have to go to advance settings to accept it and some browsers won’t let you do that anymore. When you go to accept it, look at the details to verify it has what you entered above when setting it up. Once you accept it in your browser settings, the URL loads without issue going forward.
2. Jupyter Notebook
Jupyter is well known as a solution to easily explore and share code especially in Python and machine learning communities. Thus, I set it up to visually explore data and try out code snippets. This section covers setup.
Install Jupyter Notebook.
pip install notebook
Create the notebook configuration file.
jupyter notebook --generate-config
Setup a password for the Jupyter Notebook to add additional security.
jupyter notebook password
It prompts for you to enter a password and then to re-enter it to make sure you know it. Then it will add a hashed version of the password to the config file. You need to keep a copy of the password somewhere you can find it later.
Find the config file open it because there are a few changes that are needed.
vi ~/.jupyter/jupyter_notebook_config.py
Above is the default path but if you don’t find it then search for it.
Apply the following updates into the config file to stop the notebook from trying to open a browser on the remote machine and to set the ip and port.
c.NotebookApp.open_browser = False
c.NotebookApp.ip = '*'
c.NotebookApp.port = 8888
If using the SSL certificate, also add the location of the certificate file and the private key to the config file.
c.NotebookApp.certfile = u'/home/[Path]/ssl_cert/example.pem'
c.NotebookApp.keyfile = u'/home/[Path]/ssl_cert/example.key'
Note, [Path] needs to be updated to your server’s specific path for these files.
Firewall Rules | If using SSL
When I first setup my GCE instance, I didn’t enable outside access for Jupyter Notebook on the server. I had to go back and add a firewall rule and include it on the instance.
Setup a Firewall rule under VPC network in the Google Cloud Console.
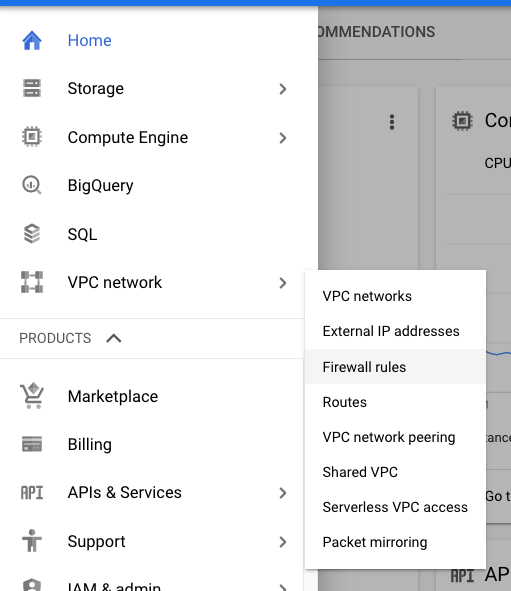
Choose to Create Firewall Rule to add one.

Fill out the form with a Name, Priority, Direction of traffic, Source IP range and Specified protocols and ports similar to below.
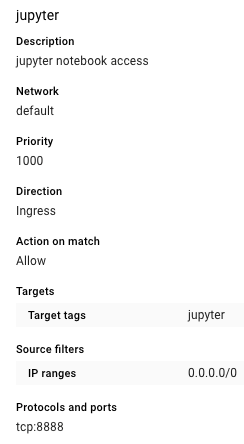
You don’t have to use 8888 for the port. Make sure what you use is available and note it down for the url.
After setting up the firewall, go back into the Compute Engine instance on the console and click on the the instance to open up its details.
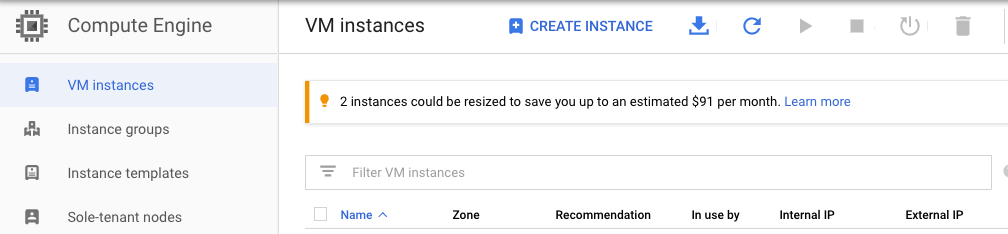
Click on Edit at the top and scroll to the Firewalls section.

Add the name of the Network tag.
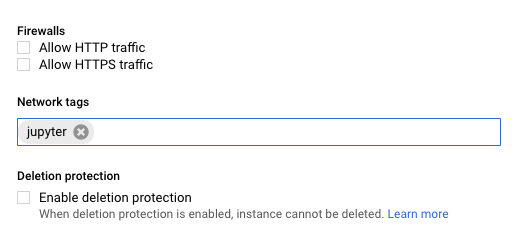
I used jupyter as the name under Firewall Rules. This name is what you decide but make sure it matches what you setup in the rules.
Save change and go back to the terminal to kick off a notebook. Note, you do not have to restart your instance after applying the firewall updates.
Browser Access
In the remote GCE instance terminal, use the command to start a notebook instance.
jupyter notebook
Note, consider using GNU screen to run the notebook in a virtual terminal.
Open a browser window on your local computer and enter the following to open the notebook.
https://[External IP]:8888
If you didn’t use SSL then you can use the following in your browser.
http://[External IP]:8888
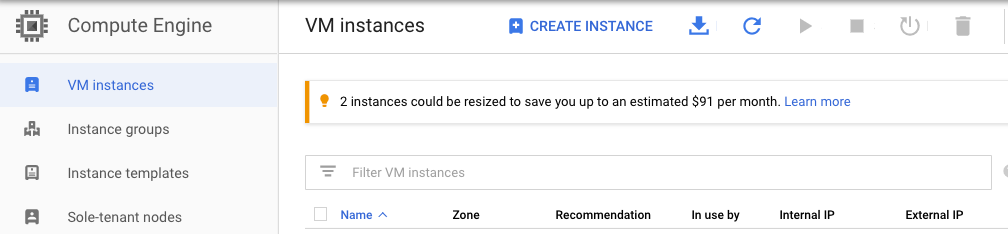
The External IP is the ip address in the GCP console under the Compute Engine VM dashboard.
SSL Complications | Browser Issues
Remember the browser will probably refuse and block opening the self-signed certificate and you will have to go to advance settings to accept it. As mentioned, look at the details to verify it has what you entered during setup when accepting the certificate.
If you setup a password, you will need to enter it the first time you load the page and any time you logout.
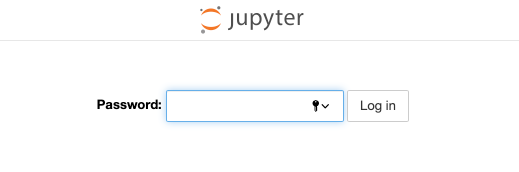
And success the notebook loads and you can start creating files.

Wrap up
Something to highlight is that if you forget to install something, you can simply install it and keep going. There is no need to restart the VM and this is also true for the Jupyter Notebook.
And there you have it. This is a way to setup Jupyter Notebook to run on a remote GCE and access it using HTTPS. Another way to setup and serve Jupyter Notebook especially to multiple users is to install JupyterHub and this link is a great post if you want to go that route.
$ cd /posts/ — all posts