6 minutes
How to run any ML package on GCP | The Setup
Originally published on Medium, Jul 18, 2017
How to run any ML package on GCP | The Setup

Recently, I joined Google to work on machine learning and Cloud. The first questions on my mind were how would I use Google Cloud Platform (GCP) like I’ve used other platforms to run whatever machine learning (ML) software that I want to use. This post is sharing a few things I’ve picked up over the last couple months with the intent to help others looking at GCP.
If you haven’t heard Google has a little known ML platform called TensorFlow (TF) that is popular for deep learning algorithms. Check it out if you haven’t. There are many resources out there to explore it.
TF is not the only kid on the block, and I know this especially because prior to Google, I built a different platform. There are many machine learning packages out there that are used for different reasons, and the goal of this is to help users understand that GCP can be used for your “fill in the blank” ML software.
I’ve broken this down into two posts with one that walks through setup of a virtual machine (VM) on GCP, and the second sharing a couple example software packages and showing how to run them on the VM. And I’m publishing both posts at the same time for the bingers out there.
Part 1: Setup Virtual Machine
First you need a server (or servers) to work with your software. Now this part can take a lot of time which is why there are efforts to simplify and remove setup. For this post and for now, we are going manual on server setup. Below is one approach, and there are plenty of variations on how you can setup a VM based on what your needs are.
The following walkthrough takes place in a standard terminal and the Google Cloud Console which is a web UI. Setting up a VM on GCE covers these key steps:
- Pre-config: Add GPUs & Setup Firewall Access
- Define & Start Customized Instance
- Access VM, Configure & Manage
***Side note about Names (GCP and GCE)***On GCP, the section that gives access to spinning up a VM is labeled Google Compute Engine (GCE). When I use GCP, I’m referring to Cloud at Google in general, and this covers data products like Bigtable & Storage to management tools like Stackdriver and any Google Cloud product. GCE specifically refers to VMs, Container Engine and App Engine products which all fall under the broader GCP umbrella. Note, if you use anything under the machine learning product section of GCP then those products are using VMs from GCE but you don’t have to deal with the setup steps below.
Add GPUs (if no quota available)
Because new accounts start with zero GPU quota, you need to add by taking the following steps:
- Set up billing in GCP account
- Fill out the quota request form (also on GCE Quota page under Request)
- Requests processed almost immediately with billing history
- Cannot be added with a free trial period
- GPUs are only available in these regions
Setup Firewall for Jupyter Notebook
Use this walk-though for help on how to setup firewall rules for remote access. In this case, we want to run some of our examples on the VM we setup with Jupyter Notebook.
Under GCP Networking section, choose Firewall rules.
Use the following configuration for Jupyter to setup the firewall rule:
You will reference the name of this rule when setting up the VM.
Setup Customized VM
Now we get to the good stuff of setting up a virtual machine and there are great resources on how to get a VM setup. Below steps through key points related to this post. First go to your Compute Engine VM instances dashboard:
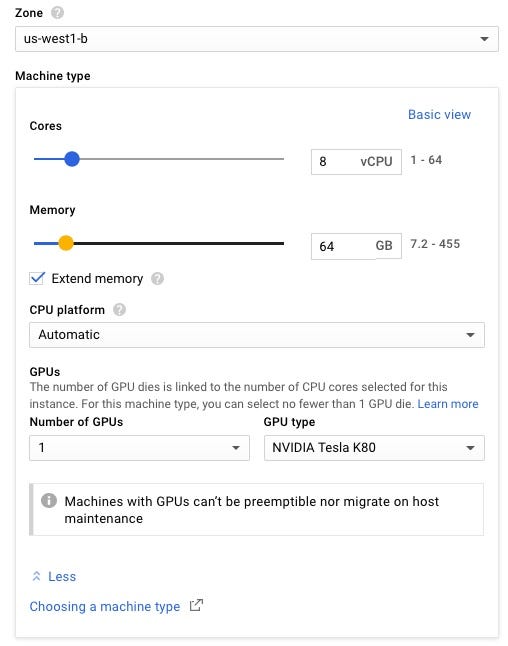
- Select Create Instance and under Machine type choose Customize
- Make sure the Zone is set to where GPU quota exists
- Adjust Cores and Memory as needed (more memory is helpful with ML)
- Expand GPUs and choose how many to add
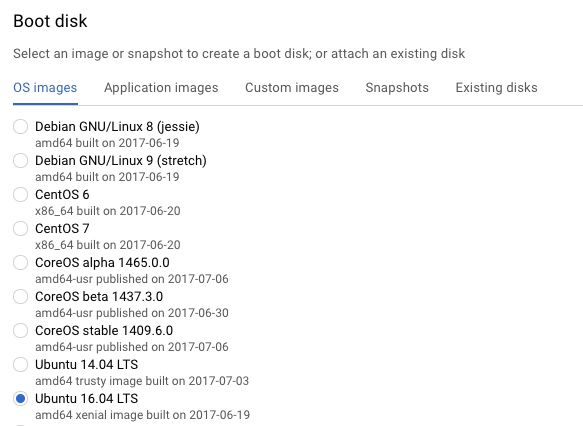
- Under Boot disk, change to one that aligns to your needs. There are several options and some instances have Kubernetes and Docker pre-installed
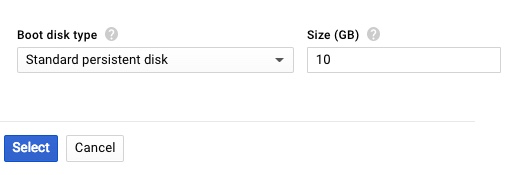
- Change Boot disk type and Size as needed
- (Optional) For Jupyter firewall access, expand Management, disks, networking, SSH keys link
- (Optional) Choose Networking and write in the jupyter tag
- Finally Choose Create to start instance
Once you’ve created the instance it will take a couple minutes to launch.
Access Instance
Options for accessing the VM include:
- GCloud SDK
- Browser Command Line (use the drop down next to SSH to open)
- Local Command Line (check Connecting using SSH on Linux or OSX workstations section*)*
Note: Review generating SSH key-pair if you haven’t done that before.
Configure Instance
This is where the fun begins because configuration can take a lot of time getting all the software you need setup properly. Some options to get your instance configured include:
- Startup script (add during Create VM step)
Apply during Create VM
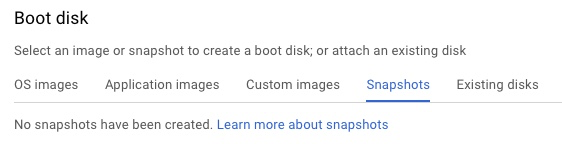
- Snapshots (choose when changing boot disk)
- Install script (run from server command line)
- Docker image
- Manually configure
I’m giving just a list of the options and encourage you to explore outside of this post. The main challenge in our setup is getting the GPU’s configured and the software setup.
For the examples in the next post, I’ve created an install script that sets up GPUs and needed libraries especially for Python ML as noted below:
https://gist.github.com/nyghtowl/6fbfd48dc01917e9c7942c250ebfe2fb
Run with the following in your server’s command line to download and configure the VM:
$ wget https://raw.githubusercontent.com/nyghtowl/mixed-tape/master/alpha-track/gce-install-gpu.sh
$ source gce-install-gpu.sh
The install script will ask to define a password for Jupyter. Remember this password because you will need it for the examples in the next blog post about running models.
Manage Instance
Once the instance is up and running and configured then you can manage the VM so that it isn’t running and charging you when you are not using it.
In the GCE Instances dashboard, select your VM and use Start, Stop, Reset and Delete commands at the top for management. Note, you are charged for a minimum of 10 minutes when the instance is started and then on a per minute basis while its running.
Additional Thoughts
What I’ve covered above gets you started, but as stated in the beginning there are many variations on how you can and should approach setup. This is not optimized for all the unique projects and problems you will work with. Spend time understanding what system setup you need.
Also as noted, there is a push within Google and without to simplify machine learning especially in regards to the setup above. In GCP, there are ML APIs and the ML Engine that enable skipping this type of setup when using TensorFlow. Pushing for removing setup steps frees us up to ramp quickly in actual ML research and delve into areas we haven’t explored. That is where things are moving.
Still its not all plug and play yet, and its important to understand the problem you are solving because that will guide software and hardware setup.
References
Thanks for the pointers on setup: Wendy Kan, Jeff Moser, Allen Day
$ cd /posts/ — all posts