8 minutes
How to run any ML package on GCP | The Models
Originally published on Medium, Jul 18, 2017
How to run any ML package on GCP | The Models

In the previous post, I showed you how to setup a virtual machine (VM) on Google Cloud Platform (GCP) so you can get started running your machine learning package of choice. Examples shared in this post are from different top frameworks in the ML space with a Python focused. Any programming language can be used as well as any package because you are just using a remote computer that you can shape as needed.
This post assumes you already have an understanding of machine learning (ML) and deep learning (DL), and in essence, you have models you are already working with. If you need to understand these concepts then spend time reading up on ML and DL and then come back. There are resources at the end of this post that you can use as a starting point.
Part 2: Setup and Run Machine Learning Software
Now that you have a server setup it’s time to get your code on. If you used the install script in the previous post all requirements will be setup. This post covers the following key steps to set up and run ML software:
- Setup software & data
- Develop & load code
- Run code
- Review results
I’ve referenced great existing code examples that help illustrate these concepts:
- Kaggle-titanic with Jupyter Notebook
- Keras CIFAR-10
- PyTorch SVHN
The first example focuses more on data analysis and covers some of the well known algorithms in ML such as SVMs, Random Forests and Logistic Regression. The last two use a neural net model (complex ML model) and focus on image analysis which is a popular research area in the field.
Side note about Data Setup There are different approaches to setting up data for model access. This post is focused on creating an instance with enough space to hold the data that you will use for these examples. There are many ML projects that require connecting data sources to the server, and I recommend looking into data products on GCP or elsewhere for help on what products to use, how to setup and how to connect outside data sources.
Also, we use data that has already been cleaned and is ready to load into the model for training. Typically, you will spend most of your time gathering and cleaning up data to prepare it for modeling.
Kaggle-titanic Data Science Example
The Kaggle-titanic example gives a great overview of data science methodology, ML models and core data science Python libraries (e.g. NumPy, Pandas, SciKit-Learn, SciPy and Matplotlib). The original competition’s goal was to help educate on ML basics.
Kaggle provides a platform and service for data science exploration. It’s become a well know resource for researchers to work with a variety of data sets and models as well as companies to expand and access experts for help with different challenges.
The Github repository for this example is a couple years old, but the concepts are very relevant. Do a little searching to see the more current syntax for the packages, but know that the Titanic notebook will run with just minor adjustments as noted below.
SetupIf you didn’t use the install script go to the the Github repo and follow instructions there. To use this example, make sure you’ve configured Jupyter Notebook according to the previous post. Also, the data is downloaded when you clone the repository.
Load CodeRun the following command in the VM to clone the example repository:
$ git clone https://github.com/agconti/kaggle-titanic
Run CodeTo use the Titanic Jupyter Notebook in this example, run the following commands on your server:
$ cd kaggle-titanic
$ jupyter notebook
In your browser address bar, enter the VM’s External IP as follows:
http://[External IP]:8888 OR
https://[External IP]:8888
A page opens asking for the password you defined when running the install setup script in the previous post.
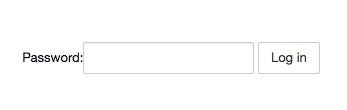
After entering the password, you will have access to the Jupyter file directory in the browser and click on the Titanic notebook to open and run.
Review ResultsNow play around with the notebook to see how the models work, and how to experiment with them.
Minor Adjustments
When running the notebook, it threw the following error under the data visualization section:
IOPub data rate exceeded.
The notebook server will temporarily stop sending output
to the client in order to avoid crashing it.
To change this limit, set the config variable
`--NotebookApp.iopub_data_rate_limit`.
To get around this make a change to the config file:
$ vi ~/.jupyter/jupyter_notebook_config.py
Un-comment the following line and add a couple zeros on the end before saving.
c.NotebookApp.iopub_data_rate_limit = 1000000000
Also, in the Jupyter Notebook, change .ix to .iloc
Keras CIFAR-10 Example
Keras is a neural net (NN) API that has gained a significant following because it provides an easy interface and sits on top of other frameworks (Theano, TensorFlow and CNTK). This example uses the CIFAR-10 dataset which is a curated group of 60k images covering 10 categories to help with image classification modeling. More information can be found at CIFAR-10 project page.
SetupIf you didn’t use the install script review how to install Keras.
(Optional) Change backend to TensorFlowThe default background framework is Theano and you can change it to TensorFlow in the config file:
$ vi $HOME/.keras/keras.json
Change:
“image_dim_ordering”: “th” to “image_dim_ordering”: “tf”
“backend”: “theano” to “backend”: “tensorflow”
When running the code, it handles downloading the data to the server and how to transform and access it.
Load CodeI’ve modified the original example with functionality to save and evaluate the model. You can copy it on your computer with the following commands:
$ cd ~ && mkdir keras-code && cd keras-code
$ wget https://raw.githubusercontent.com/nyghtowl/mixed-tape/master/alpha-track/keras_cifar10.py
Run CodeWhen running code, use screen to create a persistent terminal session to run any ML code that can take more than a couple minutes to complete (which covers most scenarios). Basically, if you want to exit out of the VM it will not stop the program from running. This is very helpful when you want to sleep or change locations or just work on something else and the model takes hours (maybe days to run).
$ screen -S cifar # new screen session
$ screen -r cifar # resume screen session
You can run it on the command line by changing the directory to where the script lives and using the line:
$ python keras_cifar10.py
Review ResultsThe code will print out the accuracy and show the predictions on 20 different test images. The accuracy score is just below 50%. Thus, there is room for improvement with tuning and model exploration which is a great opportunity to practice. And if you improve on this score then you should post a PR to the original Keras example repo.
PyTorch Example
PyTorch is a newer neural net framework this year that integrates Python with Torch, a framework that has a solid history in NN research. This example uses the Street View House Numbers (SVHN)dataset which is a real-world set of 600k images obtained from house numbers in Google Street View images. The goal is recognizing digits in natural images by experimenting with object recognition models.
SetupIf you didn’t use the install script review the Github repo for installation.
Download format1 data from http://ufldl.stanford.edu/housenumbers/ into into a data folder and untar.
$ cd ~
$ mkdir data && cd data
$ wget http://ufldl.stanford.edu/housenumbers/train.tar.gz
$ wget http://ufldl.stanford.edu/housenumbers/test.tar.gz
$ wget http://ufldl.stanford.edu/housenumbers/extra.tar.gz
$ tar -xvzf test.tar.gz
$ tar -xvzf train.tar.gz
$ tar -xvzf extra.tar.gz
$ rm *.tar.gz
Load CodeRun the following code in the terminal to clone the example repository:
$ cd ~
$ git clone https://github.com/potterhsu/SVHNClassifier-PyTorch
Convert the data to lmdb structure( ~30 minutes).
$ cd ../SVHNClassifier-PyTorch # change into the SVHN example repo
$ python convert_to_lmdb.py — data_dir ../data # convert data
Run CodeRun the example with the following command line:
$ python train.py --data_dir ../data --logdir ./logs
It took ~30 hours to fully train with the configuration from the first post.
Review ResultsYou can evaluate the code by running the following:
$ python eval.py — data_dir ./data ./logs/model-100.tar
Accuracy score is about 95% on this example.
Last Thoughts
There are many other examples out there with large and small datasets and various model structures. Plus, there are plenty of ways to configure the virtual machine to optimize and speed up model training, and I haven’t even touched on distributed computing. As said in the beginning, the goal is to make Google Cloud Platform more approachable for any machine learning package. Take what works for you from this, and build on it.
References
Python, Kaggle-Titanic Example
Keras Overview
Keras CIFAR-10 Example
PyTorch Overview
PyTorch SVHN Example (Thanks for granting use Potter Hsu)TensorFlow Overview
Yuval Netzer, Tao Wang, Adam Coates, Alessandro Bissacco, Bo Wu, Andrew Y. Ng Reading Digits in Natural Images with Unsupervised Feature Learning NIPS Workshop on Deep Learning and Unsupervised Feature Learning 2011. (PDF)
CIFAR-10 by Alex Krizhevsky, Vinod Nair, and Geoffrey Hinton
Street View House Numbers (SVHN) by Yuval Netzer, Tao Wang, Adam Coates, Alessandro Bissacco, Bo Wu, Andrew Y. Ng
$ cd /posts/ — all posts