5 minutes
Setup Local Terminal Access to Compute Engine
Originally published on Medium, Feb 10, 2020
Setup Local Terminal Access to Compute Engine
I’ve been playing around with the Google Cloud Platform again in a way I haven’t done for a while. It is a strange sense of deja vu and scratches that addictive learning itch. Below are the steps I took on this latest project to setup a VM (virtual machine) on GCP and login to it from my laptop terminal (CLI).
This assumes an existing GCP account. If not then sign up to follow along.
1. Start a GCP Project
First, create a project if you don’t already have one; otherwise, pick a project to use. Go to the drop down in Select a project at the top left of the console.

Click on the down arrow to open up a dialogue box and select an existing project or create a new one.
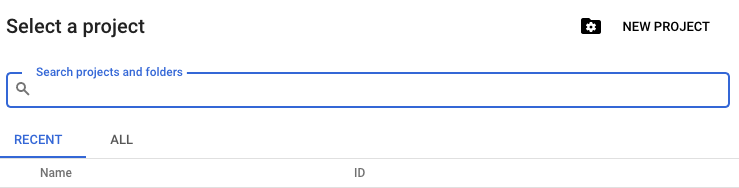
If you chose New Project, it will take you to the following page to create one.
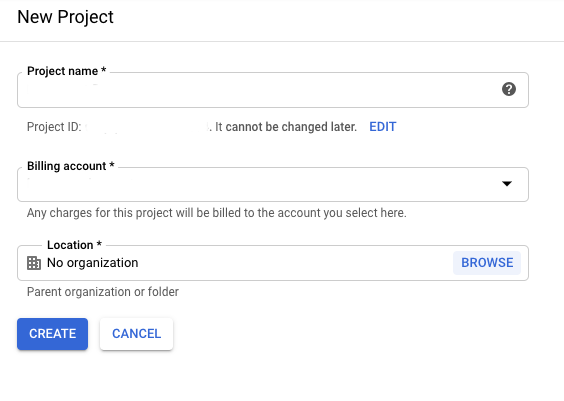
Give the project a name, apply the billing account and Create.
2. Spin up a VM
Setting up the Compute Engine VM instance is a straight forward process. Go to Compute Engine in the drop down menu on the left and select VM instances.
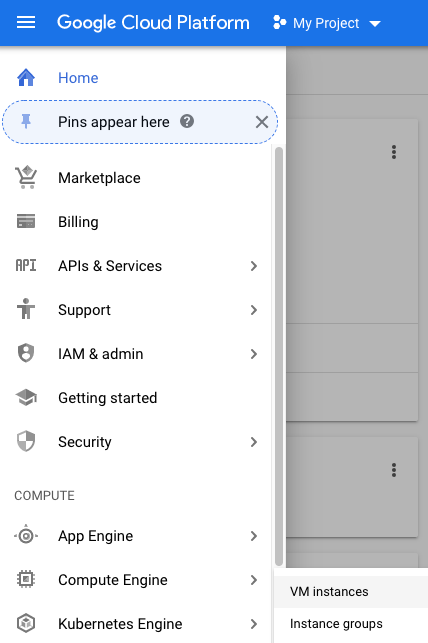
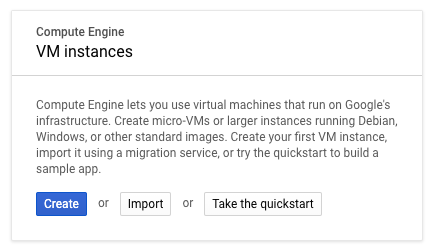
If an instance doesn’t already exist, Take the quickstart is required before creating an instance. This gives an overview of using a VM with insights like connecting via client libraries, scaling patterns, using custom machine types and most importantly understanding pricing.
After a few seconds, the Create button will be enabled to create an instance.
In the Create an instance dashboard, there are many standard configurations. I went with n-standard-8 because I need the extra memory for the computations (more on that to come). I still love how you can customize the type of instance you need in a more fine grained way than I had experienced prior to using GCP. Still, most predefined configurations are good options in many situations and I went with that for this example.
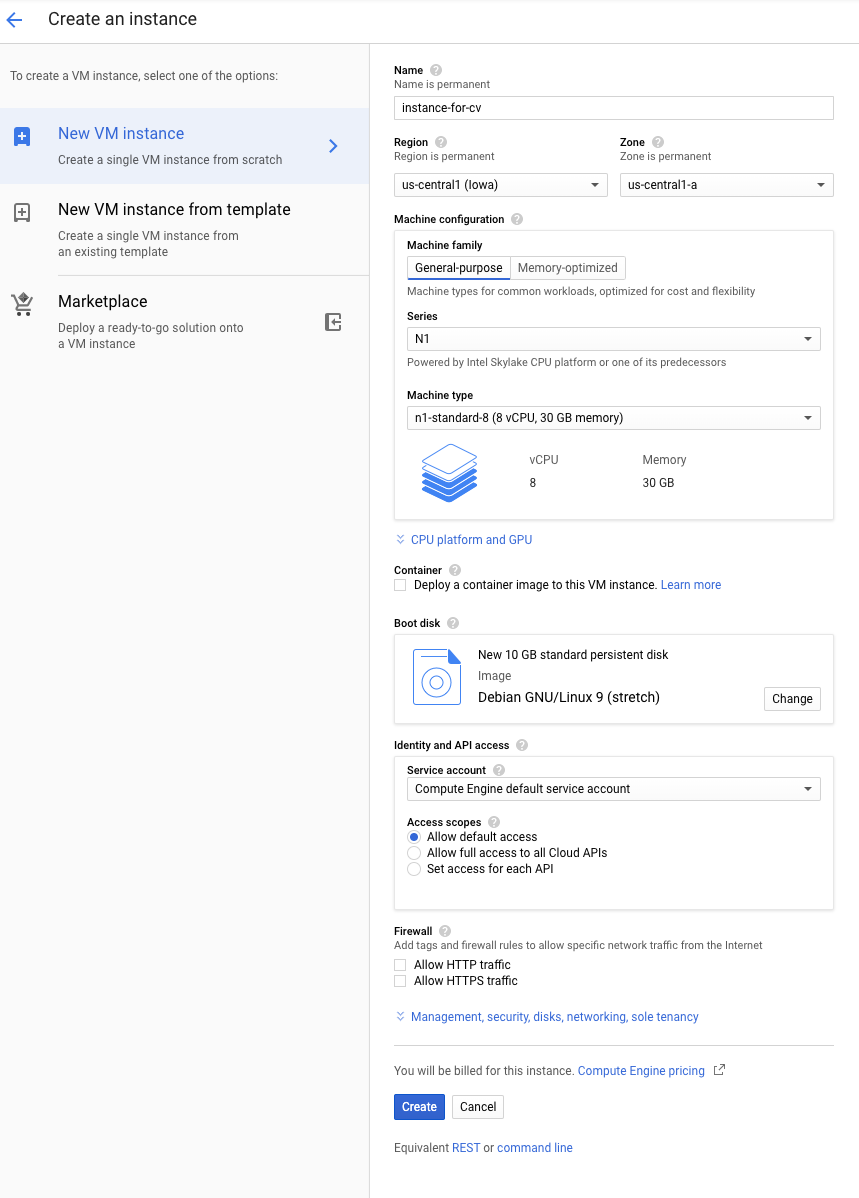
A couple points to note:
- Give the instance a Name. This is needed for the connection script.
- Note the Region during setup and adjust if needed
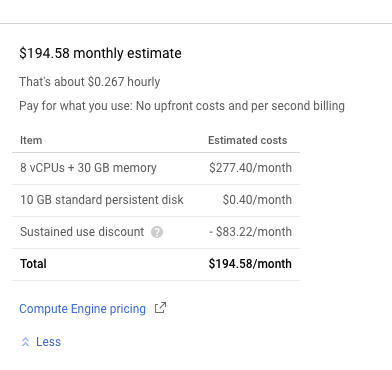
Also, the right column of the Create an instance dashboard shows pricing on an hourly and monthly basis as well as a breakdown of those costs and potential discounts. If the VM doesn’t need to be constantly running, it’s good practice and usually more price efficient to shut it down when not in use.
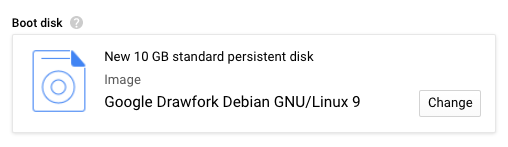
One more thing before creating the instance, bump up the storage size on the Boot disk. The default is set to 10GB with a standard persistent disk.
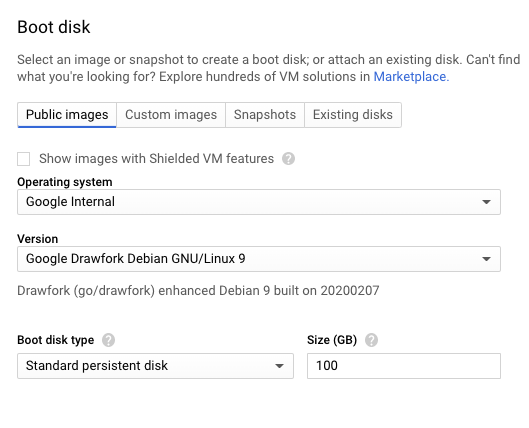
Laptops typically have 500GB and up on storage. If you have a lot of software to install on the instance and/or data you want work on to keep the latency down, you will want more space. As of the date of this post, changing it from 10GB to 100GB only adds $4 a month more if you leave it running continuously. I needed 2500GB (2.5TB) which puts it at an additional $100 per month.
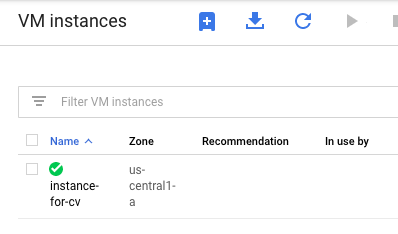
After filling in at least the required info, click on the Create button to spin up the VM. It took a couple seconds for the instance I chose to launch and show that it was ready for access with the green check mark.
3. Access the VM through CLI
I like accessing remote servers from my computer’s terminal more than through a UI. In order to do that, there is local machine setup that is needed. Note when accessing an instance, make sure there aren’t any firewall rules that are blocking the connection.
Install & Configure Google Cloud SDK
Install the Cloud SDK on your computer with this documentation. It will enable the gcloud command that you need for the connection.
Once the SDK is downloaded and the install script has been run, there are steps to initialize and finish setting up its configuration in the terminal. You can find the one you need under Quickstarts.
Initializing the SDK environment starts with using the following command in your terminal:
gcloud init
You will verify yourself by logging in with a Google account and that will redirect you to a browser window for verification. After you login to the browser it will redirect to You are now authenticated with the Google Cloud SDK! The page provides resources on what you can do with your new instance after setup.
At this point you can continue with the rest of the setup in the terminal and by following the rest of the steps on the Quickstart page. Note, you can do more of a manual setup and use a flag to prevent authorization from opening the browser window if needed.
If you want to see the current configuration use the following command.
gcloud config list
If the account email or project name are different from what you plan to connect to then make sure to update the configuration. You can have multiple accounts and projects and there are ways to switch between and set what is active. The resources linked above will help you with more details on setup but at this point you are good to go with logging into your server.
Get the Connection Command
When I went to make the connection, I found a way to get the explicit command you need for the connection.
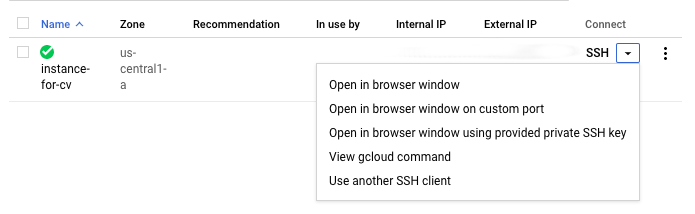
You’ll see a down arrow next to SSH and one of the options is to View the gcloud command. That opens a dialogue box and shows the command you need to use in your terminal.
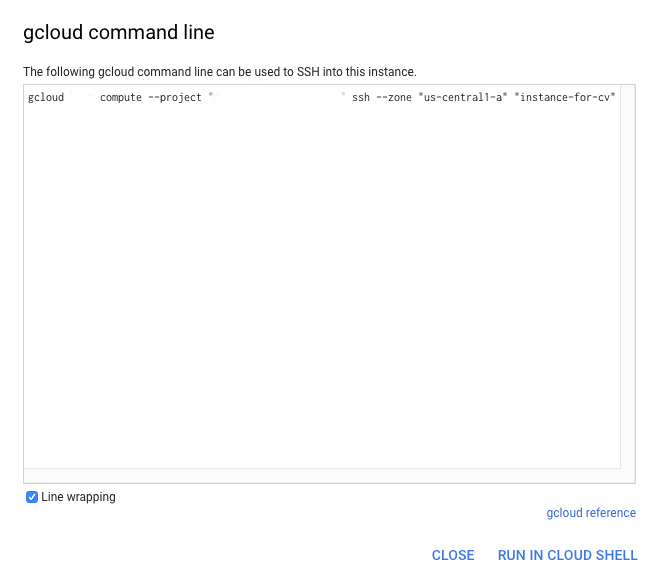
The command displayed will include the project id. Copy and enter the into the terminal.
gcloud compute ssh --project [Project Id] --zone [Zone] [Instance Name]
Connecting to instances has more information on how to connect. Note you can add these flags into a config file that minimizes the command.
Note, there are a few options in the two images above to use Cloud Shell. All the Open in a browser window optionsand Run in Cloud Shell link*.* This is a great option to explore especially if you are working from a computer that is not configured with the Cloud SDK or doesn’t have terminal access.
And that is it, the VM is setup and accessible through a local terminal.
$ cd /posts/ — all posts